Vue.js中Line第三方登录api的实现代码
(编辑:jimmy 日期: 2026/1/25 浏览:2)
国际化的项目就会用用到一些第三方的登录api,这次记录一下Line 的!
按步骤来:
注册Line账号就不说了,虽然麻烦,这就自己去想办法了!
demo 请狠狠的戳这里 http://download.lllomh.com/cliect/#/product/J417081951162505
一:开发者平台配置
去Line 的开发者平台 新建一个App:
https://developers.line.biz/en/
 "text-align: center">
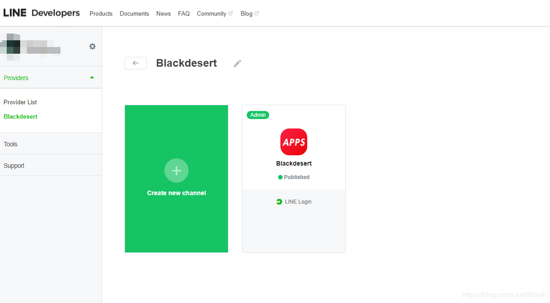 "text-align: center">
 "text-align: center">
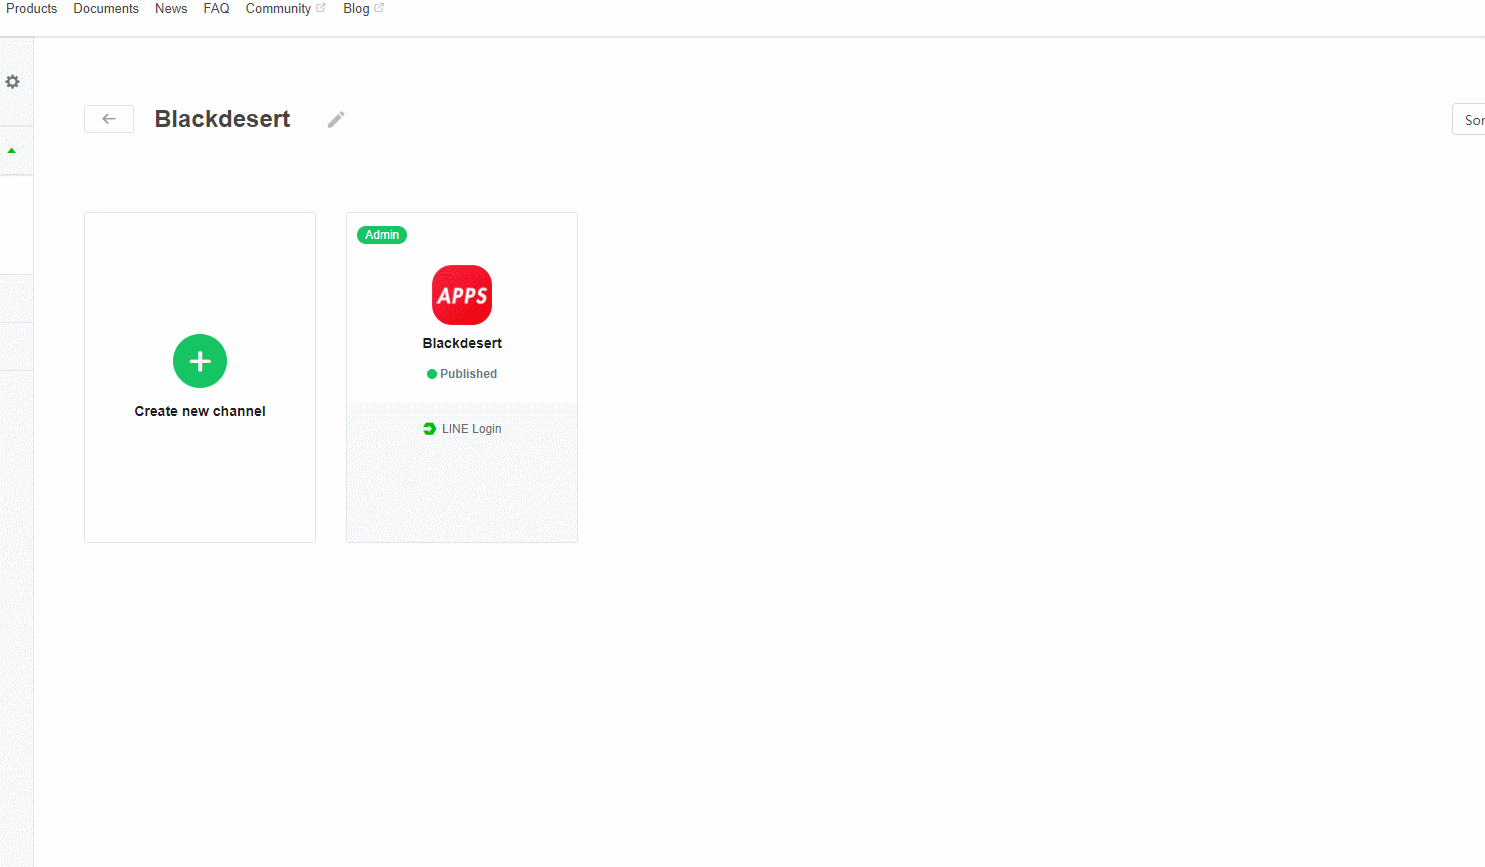 "htmlcode">
'client_id'  => '5431649755',
'client_secret'=> '234b6e64c13285e6d058ff7b1bbc8e'
关键是这里的重定向地址要填(几乎所有第三方都要):
 "color: #ff0000">二:代码部署
核心获取第三方的部分
壹:组件封装:
1,起始:这里就
const { code } = queryString.parse(window.location.search.replace('"htmlcode">


async created() {
      const { code } = queryString.parse(window.location.search.replace('"htmlcode">


async getToken(code) {
        const result = new OAuthRequest({
          code: code,
          clientId: this.clientId,
          clientSecret: this.clientSecret,
          redirectUri: this.callbackUri
        })
        const params = new URLSearchParams()
        linq.from(result.getPostable()).select(x => params.append(x.key, x.value)).toArray()

        const { data } = await axios.post('https://api.line.me/oauth2/v2.1/token', params)
        console.log(data,"data")// 这里拿到返回的第三方的结果个人信息
        return new OAuthResult(data)
      },


贰:组件封装:
1,组件使用:
除了 那个 三个参数,其他的一些 就看着修改整合吧


<template>
 <div id="app">
   <line-login-button
       :client-id="clientId"
       :client-secret="clientSecret"
       :callback-uri="callbackUri"
       @result="result"
       add-friend
       friend-required></line-login-button>
   1232131
 </div>
</template>


<script>
  import LineLoginButton from './components/LineLoginButton'

  export default {
    data() {
      return {
        clientId: '2323649755',
        clientSecret: '323128b6e64c13285e6d058ff7b1bbc8e',
        callbackUri: 'http://localhost:8080' //这里要跟开发者平台中填写的一致
      }
    },

    // created() {
    //   this.clientId = process.env.VUE_APP_LINE_CLIENT_ID
    //   this.clientSecret = process.env.VUE_APP_LINE_CLIENT_SECRET
    //   this.callbackUri = process.env.VUE_APP_LINE_CALLBACK_URL
    // },

    components: {
      LineLoginButton
    },

    methods: {
      result(res) {
        console.log(res)
      }
    }
  }

</script>

<style>
#app {
 font-family: 'Avenir', Helvetica, Arial, sans-serif;
 -webkit-font-smoothing: antialiased;
 -moz-osx-font-smoothing: grayscale;
 text-align: center;
 color: #2c3e50;
}
#nav {
 padding: 30px;
}

#nav a {
 font-weight: bold;
 color: #2c3e50;
}

#nav a.router-link-exact-active {
 color: #42b983;
}
</style>


记得安装 这个插件所需的插件:


import queryString from 'querystring'
  import axios from 'axios'
  import OAuthRequest from '../Entities/OAuthRequest'
  import linq from 'linq'
  import OAuthResult from '../Entities/OAuthResult'


结果:
 "text-align: center"> "color: #ff0000">总结

下一篇:vue实现列表滚动的过渡动画
在去年的5月23日,借助Intel Bridge Technology以及Intel Celadon两项技术的驱动,Intel为PC用户带来了Android On Windows(AOW)平台,并携手国内软件公司腾讯共同推出了腾讯应用宝电脑版,将Windows与安卓两大生态进行了融合,PC的使用体验随即被带入到了一个全新的阶段。